PC Camera Management Tool
Install the Applications
- The PC camera management tool is provided for camera settings, configuration and files download.
- Download and install the following tools to your PC;
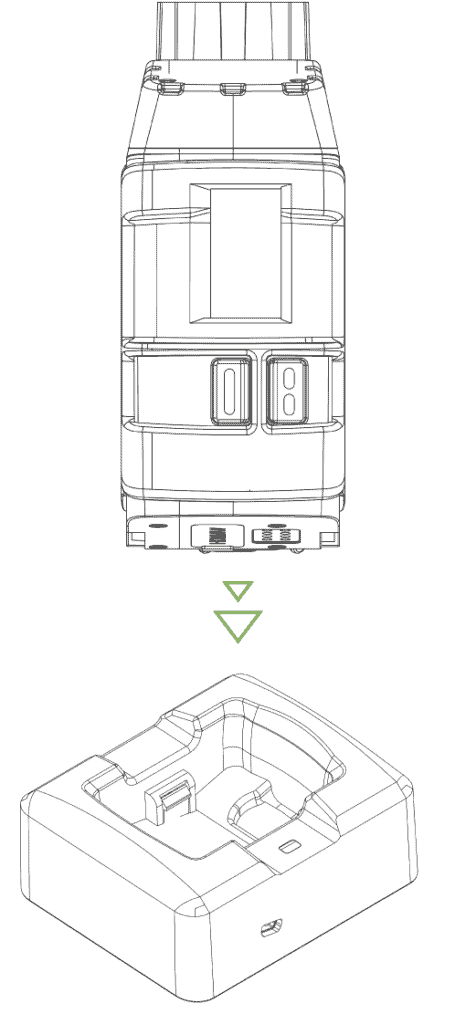
- Once installed, connect the Docking Station to one of the PC USB ports.
- Insert the camera into the Docking Station. The camera would sound a "beep," and USB CONNECT would appear on the camera LCD screen. This signals that the USB interface is activated.
Note: while the camera is connected to the docking station, it would also be charging its internal battery.
Connect the Application
- Once the application is installed, click on the management tool application icon. A welcome screen would appear:
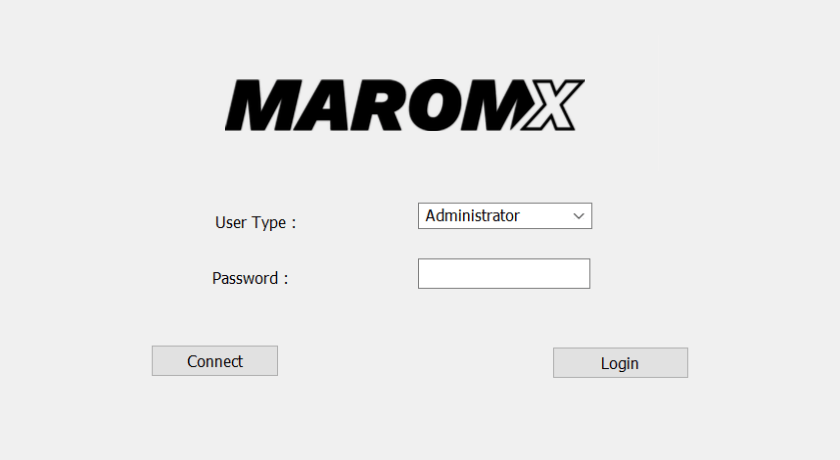
- Click the CONNECT virtual button on the screen. If the connection is successful, the writing will change to CONNECTED.
- Enter Password. The default password is "000000." It could later be changed to preference.
- Press the login button.
PC Camera Management – Menu
- Once entered, the following screen would appear:
- The sub-screens fields are as follows:
- 1. PC Tool Password
- 2. Camera Info
- 3. Network Configurations
- 4. Camera ID
- 5. Camera Configurations
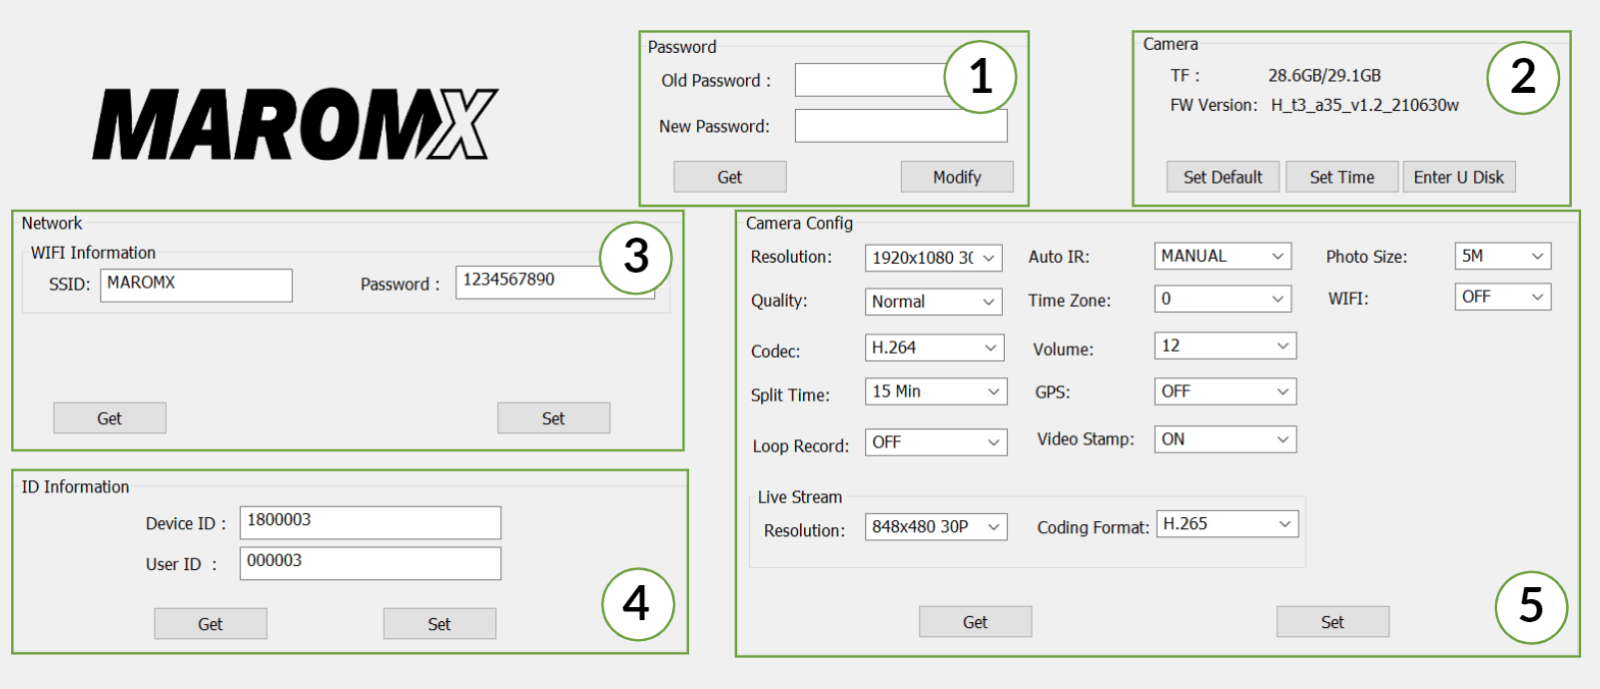
1. PC Tool Password
- In this section, you can determine a new PC Tool password if required.
- Enter the old password
- Enter the new password
2. Camera Info
- In this section, you can view and set the general camera info.
- Camera Data storage status (TF).
- FW version.
- Default settings selection.
- Set Time to Local PC time (by default).
- Enter U Disk as USB storage on your PC explorer in order to download your files.
3. Network Configurations
- In this section, you can view and set the camera streaming configurations.
- WIFI Name & Password set up as would appear on your Smartphone/Computer.
4. Camera ID
- In this section, you can determine a new camera ID if required.
- Device ID
- Police ID
Note: The ID information will be part of the video recorded watermarking and metadata signature that can be later searched in case dedicated SW was procured.
5. Camera Configurations
- In this section, you can view and set the camera configurations;
- Camera resolution
- Quality for the recorded videos
- Codec type
- Split time for the video file storage segments
- Loop recording
- Infrared initiation Mode
- Time zone
- Volume of the camera audio
- GPS
- Video Stamp
- Photo size by electronic enhancement
- Wi-Fi Streaming
- Live Stream options for WIFI
Selected Configuration
- To get the connected camera existing setting, press the relevant field GET button at each. The information will appear in the relevant fields.
- For information setting, insert information or select an option of the desired available field. After the selection is made, press the relevant field SET button to compile the settings to the connected camera. A success notification would appear.
- For options such as Set Default, Set Time, and Enter U-Disk, press the button, and the function would be activated.
Note: all settings are valid once clicked the SET button; hence the camera is ready to go and may be used once removed from the docking station. There is no need to exit the application.